This is default featured post 1 title

Go to Blogger edit html and find these sentences.Now replace these sentences with your own descriptions.This theme is Bloggerized by Lasantha Bandara - Premiumbloggertemplates.com.

This is default featured post 2 title

Go to Blogger edit html and find these sentences.Now replace these sentences with your own descriptions.This theme is Bloggerized by Lasantha Bandara - Premiumbloggertemplates.com.

This is default featured post 3 title

Go to Blogger edit html and find these sentences.Now replace these sentences with your own descriptions.This theme is Bloggerized by Lasantha Bandara - Premiumbloggertemplates.com.

This is default featured post 4 title

Go to Blogger edit html and find these sentences.Now replace these sentences with your own descriptions.This theme is Bloggerized by Lasantha Bandara - Premiumbloggertemplates.com.

This is default featured post 5 title

Go to Blogger edit html and find these sentences.Now replace these sentences with your own descriptions.This theme is Bloggerized by Lasantha Bandara - Premiumbloggertemplates.com.

This is default featured post 6 title

Go to Blogger edit html and find these sentences.Now replace these sentences with your own descriptions.This theme is Bloggerized by Lasantha Bandara - Premiumbloggertemplates.com.

This is default featured post 7 title

Go to Blogger edit html and find these sentences.Now replace these sentences with your own descriptions.This theme is Bloggerized by Lasantha Bandara - Premiumbloggertemplates.com.

Sabtu, 28 Januari 2012

Membuat Layout Sederhana dengan InDesign


Adobe InDesign adalah salah satu aplikasi dari keluarga Adobe yang mungkin sangat jarang kita gunakan, padahal fitur-fitur dalam InDesign cukup powerfull jika kita gunakan bersama dengan program grafis lainnya. Umumnya InDesign digunakan untuk melayout teks, majalah, koran, buku, poster dan segala bentuk keperluan cetak yang menggunakan lebih banyak text di dalamnya. Untuk kerperluan itulah maka fitur pengaturan/layout lebih di utamakan daripada fitur grafis lainnya.

Di jagat desain grafis, tutorial InDesign masih sangat jarang di jumpai. Mungkin karena penggunanya masih sedikit (dibandingkan Illustrator, Photoshop, etc). Disamping itu fitur-fitur yang memang sangat berbeda dari saudaranya Illustrator, photoshop, dll membuatnya terkesan rumit. Rumit bukan berarti tidak bisa di pelajari bukan?

Pada edisi kali ini Desain Studio ingin berbagi sedikit pengetahuan tentang InDesign, karena banyaknya fitur yang saling berhubungan untuk keperluan layout.. mungkin desainstudio akan menyicil tahapan tutorial tentang InDesign. Kita mulai dari yang paling awal dan yang paling sederhana, yaitu membuat layout sederhana menggunakan Adobe InDesign.


Step 1
Buka New Document (ctrl+N) di menu File. Pada jendela “New Document” kamu bisa mengatur ukuran kertas/ bidang kerja yang kamu perlukan. Secara default, InDesign menampilkan ukuran dalam satuan “picas (p0)”, untuk mengubah ke dalam ukuran lain cukup ketikkan ukuran tersebut lengkap dengan jenis ukurannya (mis : 32 cm), In Design akan otomatis mengubahnya ke dalam satuan p0 kembali (tenang, kamu bisa ubah semua settingan ukuran ini ke dalam cm nanti).


Step 2
Untuk mengubah semua settingan jenis ukuran, cukup klik kanan di ruler atas dan samping kanan halaman kerja, lalu pilih settingan ukuran yang kamu perlukan. Maka semua pengaturan ukuran di InDesign akan berubah sesuai dengan jenis ukuran yang kamu pilih.


Step 3
Sebelum memasukkan tulisan, ada baiknya terlebih dahulu kita atur dulu layout dasar seperti pengaturan Nomor Halaman dan Peletakan Header / Footernya. Klik menu Pages, lalu double klik di menu Master. Master Page adalah lembar default untuk seluruh dokumen yang kamu buat, mudahnya, apapun yang kamu ketikkan/ input (baik tulisan, gambar maupun settingan margin) akan tampil di setiap halaman kerja.


Untuk mengatur margin (pastikan masih di dalam laman Master Page) input ukuran margin yang kamu inginkan. Non Aktifkan (klik) ikon link untuk input ukuran yang berbeda.

NB : bagi kamu yang terbiasa menggunakan MS Word, mungkin penyebutan settingan marginya agak berbeda walau prinsipnya sama. Kalau di MS Word Left dan Right maka di InDesign penyebutannya Inside dan Outside. Pada menu Columns, Number untuk menentukan jumlah baris tulisan yang ingin kamu buat dan Guttter adalah jarak antara baris terebut. Silahkan berimprovisasi saja pada bagian ini sesuai degan kebutuhan. Pada tutorial ini, desainstudio menggunakan 2 columns dengan jarak 1 cm.


Step 4
Untuk membuat Header/Footer cukup tuliskan saja text dengan cara klik Text (T) lalu drag untuk membuat area text nya (di InDesign, kamu harus membuat area text terlebih dahulu dengan cara mendragnya). Jika Header/Footer kamu berupa gambar, kamu dapat memasukkannya dengan cara mengcopy gambar tersebut dari Adobe Illustrator, dsb. atau Ctrl+D untuk mengambil gambar dari file di komputer.


Step 5
Untuk Input Page Number, masukkan text (T) dengan cara men-drag-nya, ketikan 1 huruf (huruf apapun) select huruf tersebut, klik kanan maka akan muncul menu baru, pilih Insert Special Character/Markers/Current Page Number. Maka apapun huruf yang kamu ketikkan tadi akan berubah menjadi huruf “A”. Hal ini disesuaikan dengan judul Master Page (A-Master). Copy Page Number yang telah di set tadi ke halaman sebelahnya (di dalam Master Page terdapat dua halaman Master).


Step 6
Jika samua layout Master sudah di set, berikutnya double klik di lembar 1 (lembar kerja). Di lembar inilah kita akan melakukan input text dan gambar yang kita perlukan untuk dokumen kita.


Step 7
Klik Text (T) lalu drag untuk membuat area teks yang diperlukan, ketik teks kamu (dalam contoh ini Saya menyesuaikan area text dengan layout yang sudah di buat sebelumnya)


Step 8
Untuk mengatur paragraph, buka Window/Type & Tables/Paragraph (Alt+Ctrl+T) dan atur paragraph yang kamu inginkan.


NB : aktifkan “Hyphenate” untuk memunculkan tanda sambung di paragraph yang terputus, atau matikan untuk menghapusnya.


Step 9
Jika tulisan kamu terpotong di ujung column, tanda Overset Text akan muncul. Klik tanda tersebut hingga muncul preview teks kecil di cursor kamu. Arahkan kursor tersebut ke column sebelahnya dan klik, otomatis tulisan yang terpotong akan dilanjutkan.


Step 10
Jika ingin menambah page, klik di menu Create new page. Lanjutkan tulisan kamu di page lanjutan ini. Hey! coba perhatikan, Page Number yang kamu set di Master Page tadi kini muncul secata continue. begitu juga Header/Footer yang telah dibuat.


Step 11
Sebelum file di simpan, perhatikan tanda Preflight Panel di sudut kiri bawah bar Jendela InDesign. Tanda ini akan berwarna merah jika masih ada error di dalam dokumen yang kita buat. Error disebabkan masih adanya link file yang missing di dalam file yang kita input atau adanya area text yang terpotong (overset text).


Step 12
Jika sudah selesai, kamu bisa menyimpan file dokumen kamu dalam format InDesign (.indd) untuk melanjutkan di kemudian hari, atau dalam format .Pdf jika sudah rampung semuanya.

Penyimpanan dalam format .PDF :
File/Adobe PDF presets/High Quality Print.


Pilih destinasi penyimpanan file, klik OK. Akan muncul jendela Export Adobe PDF, klik Export dan tunggu hingga selesai.

10 Photography Tips from a Self-Taught Photographer

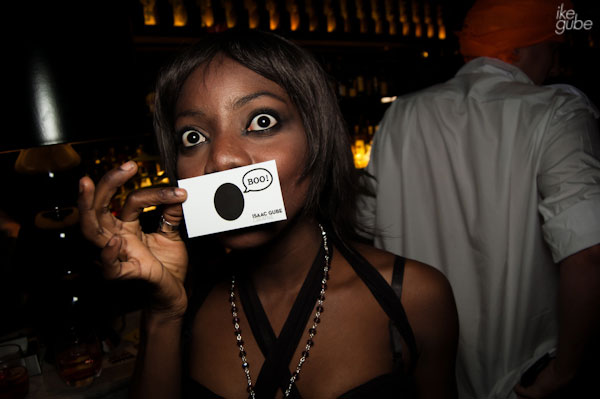
I’ve been taking pictures ever since. However, I’ve switched to a digital camera now. Today, I’ve had my work published in fashion magazines, I’ve done a few photo shoots, and I cover some of my city’s best nightlife events.
Now, I won’t pretend I’m an expert — or that I know everything there is to know about photography — because I am not, and who does?
However, being self-taught helped me learn some valuable lessons the hard, painful, torturous way and therefore, guaranteed that I never forget them. I’d like to share some of those lessons with you.
For those of you who are just starting out, or would like to take their photography to the next level, hopefully, this set of tips will help you in one way or another.
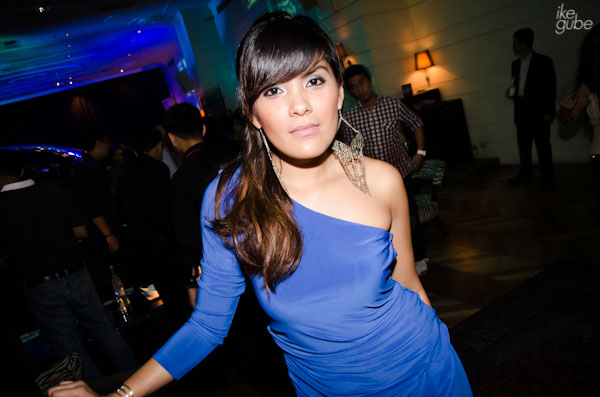
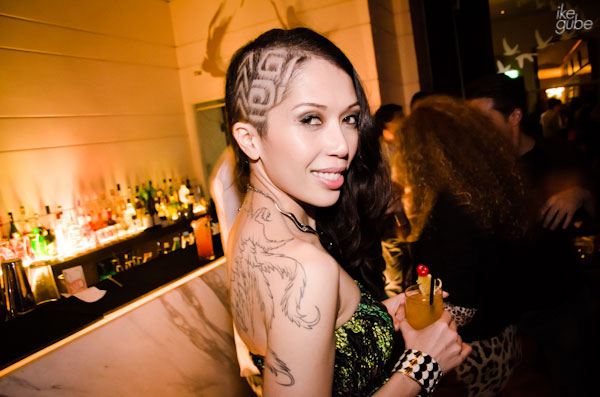
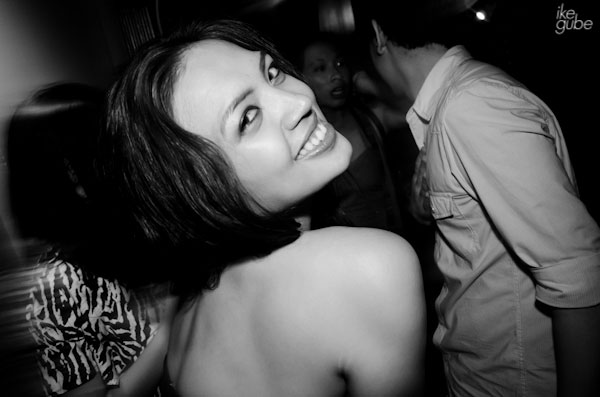
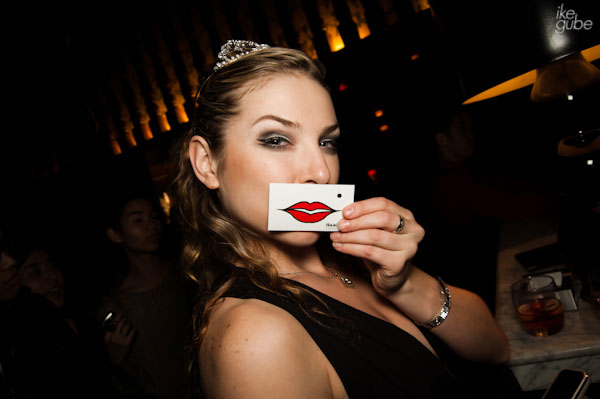
Though most of you are designers and digital artists, a popular additional profession for creatives is photography because it’s handy in many situations. For example, instead of relying on stock photos, you can take your own photos and infuse them into your work. (Some of our authors do, such as Sekani Solomon).

1. Read Your Camera’s Manual

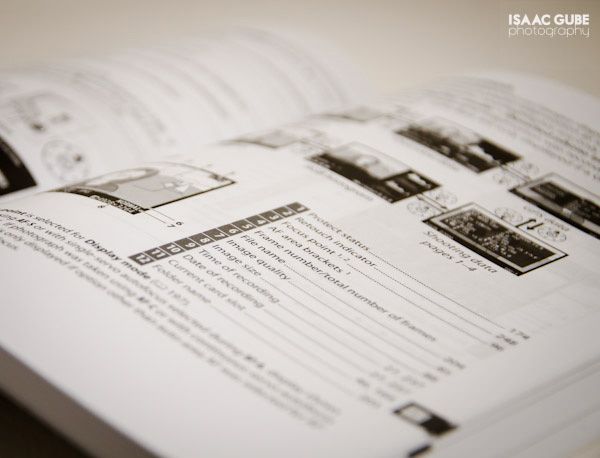
I’m not the first to say this, and I won’t be the last. It’s because reading your camera’s manual is that important. The first camera I bought was a used camera and it didn’t come with a user’s manual. After I saw the first few rolls of film I had developed, it made me wish that it did.
By the time I got my second camera, I was really getting serious with photography. And although I was at a point where I thought I was familiar with the workings of most cameras, I still sat down and read the 300+ page user’s manual that came with it. Cover to cover. And when I was done, I read it again.
You might be thinking you’re too good for the user’s manual. But let me tell you, reading your manual is important for a couple of reasons:
  • You need to become familiar with every aspect of your camera.
  • The more familiar you are with your camera, the sooner it will get out of your way.
The last thing you want to do when taking photos is to have to fiddle around with your camera when you should be composing your shot or studying your subject. Not only will you look foolish, but you will most likely kill your photo before you even get a chance to take it.

2. Find Something to Shoot

There’s no point in having a camera if you have nothing to shoot. You will waste a lot of time and energy trying to make sense of the hundreds of dollars you spent on your fancy new camera if you don’t have a subject.
The beauty of photography is that it has a certain urgency associated with it. No photo gets taken without the need for it. The moment comes, you have your camera, and you make a decision to press on the shutter release. That’s the nature of photography. The photo is contingent upon a need for it.
Even if you create the need (e.g., fashion shoots, culinary photography, actively going out into the world to take photos), what you’re actually doing is actively creating the conditions in which photos must be taken. You create those conditions. It is an active choice for the photographer.
The act of finding your subject is important. Your subject says more about you than you think.
Your subject tells people that you were there and that’s what you saw and that’s what you chose to take a picture of. As a photographer, you not only record moments in a story, you record moments in your story. Your photos place you in space and time and, to some extent, you become your subject.

3. The Camera is Just a Camera

Sure it’s made of super cool materials like magnesium and glass and plastic. It has so many buttons and dials and doodads and thingamabobs. It may seem like your camera is some kind of super gadget ready to be sent into space, able to do magnificent, unfathomable things; but really, it’s just a lightproof box with a hole on the front.
No matter how technologically advanced a camera is, it still needs a photographer setting its dials, pressing its buttons, and pointing it at something interesting.
Actually, come to think of it, NASA did send out a couple of cameras into space called Voyager 1 and Voyager 2. Those actually were technologically advanced enough to be sent into space, and yet they still needed instructions from people here on Earth.
What I’m really hinting at is that the camera doesn’t make the photographer. It doesn’t matter if you use a plastic toy camera you found in the discount bin at your local store or if you use a super expensive professional grade, nuclear-powered DSLR that also works as a beacon for your mothership.
The bottom line is, when a person looks at a picture, and that picture is judged to be good or bad, they’re not judging the equipment you used. They’ll be judging the photographer who took it.
The principles of photography haven’t changed that drastically since it first emerged in the 1860’s. It’s still about controlling how much light is allowed to pass through a lens and onto a recording medium.  And yet, there’s still that misconception that the technology is what’s responsible for good photography. The technology was just the spark. The flame is kept alive by the photographer.

4. Learn About Exposure

Exposure, simply speaking, is the combination of three main variables that control the amount of light that is allowed to interact with your camera’s sensor or film. These are:
  • Shutter speed
  • Aperture
  • Film speed (or ISO)
The right combination of these variables is at the heart and soul of every photograph that has ever been taken.
However, exposure is an infinitely nuanced topic that belies its seeming simplicity. Entire libraries have been written about the subject of exposure and even more books are being written on the subject as you read this.
That’s because most photographers who have even a modicum of experience under their belt will have their own opinions about the subject and all of them are right (or wrong, depending on whom you ask).
Even I, with barely a couple of years of professional experience, have my own opinions about exposure (hint: it’s magic!).
Therefore, my suggestion is to find a way of understanding the fundamentals of proper exposure and learn it on your own terms until you are able to apply it to how you personally take photos.
Read a book, take a class, or learn it with a friend. In any case, you must learn how to expose properly so that you know which rules to break and how to break them for your own purposes.
The technical aspects of photography — the parts detached from the “artistry” and the aesthetics of photography — is a broad pool of knowledge filled with numbers and meters and measurements and science and rules. And while there is a purpose to all that knowledge, it doesn’t necessarily mean that it will all apply to your own work as a photographer.

5. Learn Composition

Learning to compose a shot isn’t merely about framing your subject within the four corners of your viewfinder (although it is that also). Composition (at least to me) has a lot to do with emotion, motion, feel, color, and a million other variables.
You can take all the photography classes in the world. You can do everything right. You can follow all the rules about taking a good photo. However, if something is not right in your photo, then something is just not right. If the photo looks good, then it’s good. The photo doesn’t lie.
Therefore, my suggestion is to learn the fundamentals of composition (e.g. the rule of thirds, etc.) and find a way to adapt it to your own work. Know it, understand it, and then use/abuse what you need to make your work great.

6. Take Your Time

With the way cameras work these days, it’s easy to get caught up in the notion that photography is about catching a fleeting moment. Even camera manufacturers sometimes highlight this notion in some of their ad campaigns.
This is misleading for a couple of reasons. First, a moment is only fleeting when you’re not ready for it. Secondly, as a photographer with a purpose, your job is to always be ready.
There’s an old saying that photojournalists use that says, “f/8 and be there.” This means that you set your aperture at f/8 — which is considered by many to be a magical f-stop in which most of your frame will be in sharp focus — and that you are there in the scene.
Now, being there isn’t just a geographic distinction. I’ve also taken it to mean that it is about being mentally, emotionally, and psychologically there. It means taking your time setting up the shot or taking your time preparing yourself.
When you’re there and you are ready for that so-called “fleeting moment,” then time is no longer a factor. The act of taking a photo no longer is a product of luck, but rather, an act of will.
Even those “lucky” shots that some photographers will tell you about aren’t really lucky shots if you think about it. They were there, they had the presence of mind to know what they wanted out of their photo, and they made an active decision to take a shot.
This is one of the most painful lessons I learned. I used to rush when taking photos, thinking that I wasn’t going to have enough light during an outdoor shoot or I felt pressured because so many people were waiting on me. I was chasing after that “fleeting moment.” The resulting pictures were always underwhelming.
I’ve rushed through enough photo shoots to know that even if you feel you have very little time to get the shot you need (e.g., when the sun is about to go down, etc.), you actually have more time than you need if you slow yourself down and think about what you’re doing and what you want.
It only takes a split second to actually press that button, which is why you can spare a few minutes to set up and get ready for the shot you want to take.

7. Turn Around

This is something I learned when I first started taking photos. I was so focused on what was in front of me that I missed out on everything else that surrounded me.
One disadvantage of photography (or endearing characteristic, depending on how you look at it) is that it forces the photographer to see our boundless, 3-dimensional world, through a rather limited, 2-dimensional box. This is enough of a challenge that sometimes that’s all we’re focused on doing and we miss out on everything else.
So when you’re staring through your viewfinder just itching to take that perfect shot, take a moment and look around you. You never know what you might find.

8. Smile

When you think about it, a camera is a very threatening object to a lot of people. That’s because cameras represent the possibility of an invasion of privacy.
The camera captures people’s actions, candid moments, and things people might not always want recorded. In other words, in front of and around a camera, people often feel vulnerable and exposed.
The camera doesn’t discriminate. It does not censor itself. It captures everything you put in front of its lens. That’s why it’s up to the photographer to make their subjects and those around him feel at ease in the presence of his camera.
One way of doing this is to smile sincerely at your subjects and those around you.
I take a lot of photos of people I don’t know. Now, I’m a nice guy. I’m funny and I’m always up for an interesting conversation. But most people I meet and take pictures of don’t know that about me at first glance. Add a camera into that equation and it makes for a lot of awkward moments.
That’s why, in these situations, a smile goes a long way. It shows you’re friendly and that you won’t abuse the privilege of taking people’s pictures.
Even on photo shoots with paid models whose job is to be in front of a camera, a smile, and keeping them at ease, helps with having a more relaxed and pleasant photo shoot.

9. Join a Club or Shoot with Someone

I’ve never had the opportunity to shoot with someone else. It’s not something I’ve sought to do personally. However, I can definitely see the appeal of shooting with like-minded individuals.
We all have different experiences when it comes to photography, sharing those experiences with someone else can be very enriching and mutually rewarding. Just like in a class environment, we often learn more through discussion and other people’s experiences than if we had studied alone.

10. Keep Shooting

The last thing I’ll say is to just keep shooting. Nothing beats experience. You can take all the photography courses you want, read every book about photography, talk about it, and read terribly long-winded articles like this one, but nothing will help you take better photos than just going out there and doing it and learning your own personal lessons.
The more you shoot, the better you’ll be at taking photos and the more insight you will gain into how you can improve.
Sure, there are fundamentals in photography. There are rules and guidelines to being an effective photographer. But going out there and just shooting is the only way to master them.
And once you’ve mastered and understood those fundamentals, you’ll be better equipped to bend or break them when you find yourself needing to create something truly unique and good.

10 Photography Tips for Better Party Photos

Party photo tip: Group photosIntroduction

Those of you who’ve been coming to this site for a while might already know that I take photos professionally. When I’m not working on Design Instruct, I work as an event photographer, so I’ve covered more than my fair share of parties and events.
In this article, I’ll assume that you’re already familiar with the basics of photography. If not, whenever you encounter a term or concept that you’re not familiar with, check out this overview of Photography-related topics on Wikipedia.
With that said, below are some photography tips to keep in mind at your next social event.

1. Add Depth to Group Photos by Not Shooting Dead-Center

When I first started taking photos of groups of people, I noticed that they tended to arrange themselves into a straight line, shoulder-to-shoulder, as though they were taking a class photo. Or, if people were sitting on a couch, they would always expect me to take their photo from dead center. And, in my experience, these situations often end up in a boring photo (at least in my book).
In a dynamic and fast-paced environment such as a party — with lots of people and not enough room or time to have a group arrange themselves into an interesting configuration — it’s the job of the photographer to make the shot more interesting.
From my experience, a step to one side from the center of the group will impart a feeling of depth to a group photo. This happens because one side of the group will be closer to your lens, thus adding depth and creating a more captivating composition. Try it out!
Party photo tip: Group photos

2. Create Interesting Photo Effects with Jaunty Angles

A jaunty or canted angle (also known as a Dutch angle, among several other terms) is a photography technique that you can use to develop an aesthetically-pleasing composition from an otherwise dull scene. Jaunty angles give your photos a feeling of being dynamic and alive.
Party photo tip: Dutch Angle Example
Using jaunty angles is tricky because it can add a feeling of confusion to a photo if you don’t keep the composition in mind.
However, once you get the hang of it, it’ll add a really great effect of making your photos look livelier and full of fun — and that’s exactly what we want when we’re snapping at parties.
In addition, I find that you’ll often be able to get the best angles of your photo subjects using jaunty angles.
Party photo tip #2: Dutch Angle Example
In a nutshell, I like to pick a focal point in a photo that I want to highlight. Then, I keep that focal point level, tilting the camera accordingly.
For instance, if I find someone’s eyes attractive, I’ll use that person’s eyes as my focal point. I’ll align their eyes so that they’re level, while the rest of the photo isn’t.
Party photo tip: Jaunty Angle Example 2
Party photo tip: Canted Angle Example 3
Sometimes I’ll see photographers just tilt their camera to one side without really keeping the composition in mind, making their photos look disoriented and unsteady. Through my own trials and errors (and there have been many), I’ve come to the conclusion that there’s a right way and wrong way to use jaunty angles: It’s not enough to just tilt your camera to one side.
To learn more about jaunty/Dutch angles, check out the following links:

3. Try Using Props

This is always fun. People seem to love this and it often brings the party together. In my experience, props can be anything from a hat, funky glasses or a fake mustache.
Party photo tip: using props example
For instance, In a Halloween event I was shooting, I printed out business cards with different kinds of "smiles" on the back of them. Then I had people hold it up to their mouths as a sort of impromptu, quasi-costume.
Party photo tip: using props example 2
Party photo tip: using props example 3

Why Designers Should Take Up Photography

Some Background

Some of you who follow Design Instruct religiously may also be aware of the fact that, apart from my work here as the chief editor, I’m also a professional photographer.
Over the past couple of years since I first started shooting photos more seriously, I’ve learned a few things from it that I’ve found to be very advantageous in my work as a graphic designer and co-founder of a site that deals with design-related subjects.
What follows are some reasons why designers would benefit greatly from learning photography.

You Become More Sensitive to Composition

Composing a photograph within the four corners of a camera’s viewfinder is very much like laying out a poster or creating an illustration for a client.
Just as a designer uses the principles of balance, flow and focal points to produce an effective design, so too must a photographer use the same principles in order to get a visually striking photo.
Furthermore, just like a good designer, a good photographer must strike that perfect balance between the purpose and function of an image alongside its aesthetic qualities.
What I found very enlightening about working as a photographer is that, after some time, I started seeing the world around me in terms of balance, placement and flow, as though I was taking a photo and constantly composing a scene in my mind.
I started paying attention to movement. I became more observant of color and lighting. I automatically scanned my surroundings for possible subjects and points of interest, even when I didn’t have a camera with me.
I started making all of these considerations without really being conscious about them. As a designer, you probably do this sort of thing too, studying the typographic composition of a poster you saw while walking to work, or the layout of a beautiful web design you happened to stumble upon while reading your RSS feed.
This ability — this spatial awareness — transferred well to my work as a designer. I noticed that I wasn’t second-guessing most of my layouts anymore. I also got better at judging scale and the space of various design elements I was working with, becoming a more productive and effective artist as a result.

You Become More Observant of Things Around You

Photography, at least in my experience, forces you to observe. It requires you to have a perspective, your own point of view.
There’s a sense of deliberateness and urgency associated with taking a photo. A photographer studies the subject, checks his exposure, waits for the moment, and he presses the shutter release only when he gets the urge to do so. No photo gets taken without that need for it.
A photo, then, is the by-product of a long chain of contingent events that surround the photographer. There is a well-defined process. It might be different for everyone, but there is a process nonetheless.
The beauty of photography, especially with today’s digital storage capabilities, is that it allows you to go through that process thousands upon thousands of times. Therefore, almost instantaneously, you have the opportunity to learn something new, improve and develop your work thousands upon thousands of times as well.
Anything from the subject and content to the composition and color is at the mercy of the photographer when going through the act of taking a photo.
That’s why the more photos you take, the more in-tuned you become to the subtle nuances of these elements. And these elements also happen to be the fundamental building blocks of most visual arts, whether we’re talking about designing a website or creating billboard advertisements.

Color and Light Take On a Whole New Meaning

I hope I’m not assuming too much when I say that most of you reading this — designers, illustrators, visual artists and so on — are people who have chosen to pursue their interests in a creative/visual field. And, because sight and vision are large parts of what we do, I also assume most of you already have a respect for, or are at least aware of, how light and color relates to visual mediums.
Those of you who understand how our vision works will know that it’s made possible by light passing through a clear, lens-like membrane onto a group of light-sensitive nerves in our eyeballs that, in turn, converts the different light frequencies and wavelengths into electric signals sent to the brain.
This process results in what we would call the sense of sight.
Photography is built around a very similar process. Light passes through a lens and is recorded onto a light-sensitive medium (e.g. film, photosensitive emulsions or light sensors).
In either case, the sense of sight and photography are really just two different ways of interpreting or recording light.
After having taken thousands of photos, I found myself being more sensitive to changes in color temperature, such as the warmness or coolness of light sources. I became a stickler for accurate colors in LCD monitors and printers. I’ve even made enemies of a few local printers after they delivered botched print jobs due to equipment that was improperly calibrated.
The point is this: When you start seeing the subtleties of color, every shade suddenly takes on a different meaning.
For any artist dealing in the visual side of things, an understanding of color can be a very valuable asset to have in your work because it affords you an invaluable tool for your creative endeavors.

It’s Practical

Beyond the artistic merits of photography or the advantages it can bring to your work as a designer on a theoretical level, taking up photography can be extremely beneficial in more practical terms.
First, if you’re already a digital artist, designer, illustrator and the like, then you’ll probably already have the basic skills and the fundamental knowledge needed for creating a visually pleasing composition. Photography might just be a great fit for you.
In terms of complementing your work as a designer, photography grants you the ability to make your own graphic assets — textures, stock photos, reference images, etc. — exactly as you want them.
A camera is also a way you can keep a visual diary of the things that inspire you in the real world. For designers, a camera — just like a notebook — can be an invaluable tool for keeping track of ideas and exploring them later on. You can take photos of typography found in storefronts, of street art, of architectural wonders in your city — the list of potential inspiration points is nearly endless.
From a monetary standpoint — and I know that must sound like a completely sell-out thing to say — being a good photographer is also another service you can provide your clients and is a great way to supplement your earning potential.

Parting Words

After all is said and done, the real value of photography to a designer — or anyone working in a creative field — is that photography is, in itself, a creative endeavor and is thus another outlet for creative expression and exploration.
As designers, I think most of you would agree that learning and continually adapting to the fast pace of the creative industry is just part of the job.
Photography is just one of the many ways we can explore our ideas and develop different ways of thinking about visual mediums.
From my own personal experiences as a photographer, I’ve found taking photos to be a great tool in understanding my own preferences in art and design.
Hopefully, those of you who decide to start shooting will find the experience as illuminating and rewarding as I have

Netpreneur Blog Indonesia

Share

Twitter Delicious Facebook Digg Stumbleupon Favorites More